How it works

Every step, with real screenshots.

About 10 minutes of setup for you. About a minute for each guest. Every picture below comes from our live site, using a test event for a fictional couple, Maya & Daniel.

Watch first

The one-minute version.

How you share it, how guests leave a message, and what you get back. Captions are on, so it works with the sound off.

59 seconds · captions on · app screens in the video are simplified, and the guests are fictional. Want the details? Every step is below, with real screenshots.

Before your event · 30 seconds

The checklist

  • Your dashboard link is bookmarked.
  • You left yourself a test message and it showed up.
  • The guest link is in the group chat or invitation.
  • QR signs are printed, one for the entrance and one per table or bar.
  • Someone (the MC, DJ or a friend) has the announcement line below.
  • Kiosk only: the iPad is charged, on its stand, with Guided Access on.

Part 1 · For hosts

Set it up, share it, press one button.

Step 1About 1 minute

Fill in your event

  1. Tap Start now at the top of any page.
  2. Pick the occasion, then type both names, the date and your ZIP code.
  3. Type the email you check most. Your private links go there.

You’re done when every box is filled in and your email is spelled right.
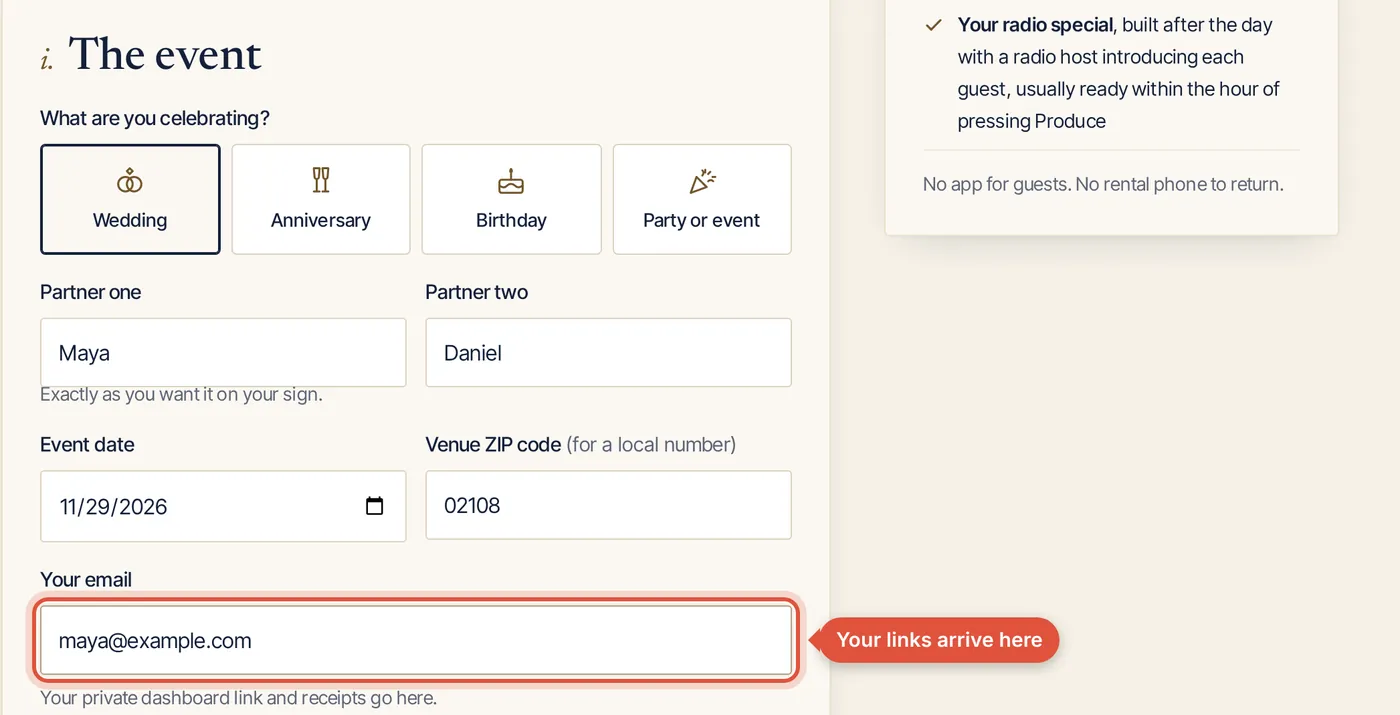
The Start page: choose the occasion, then type both names, the date, your ZIP code and your email.

Step 2About 30 seconds

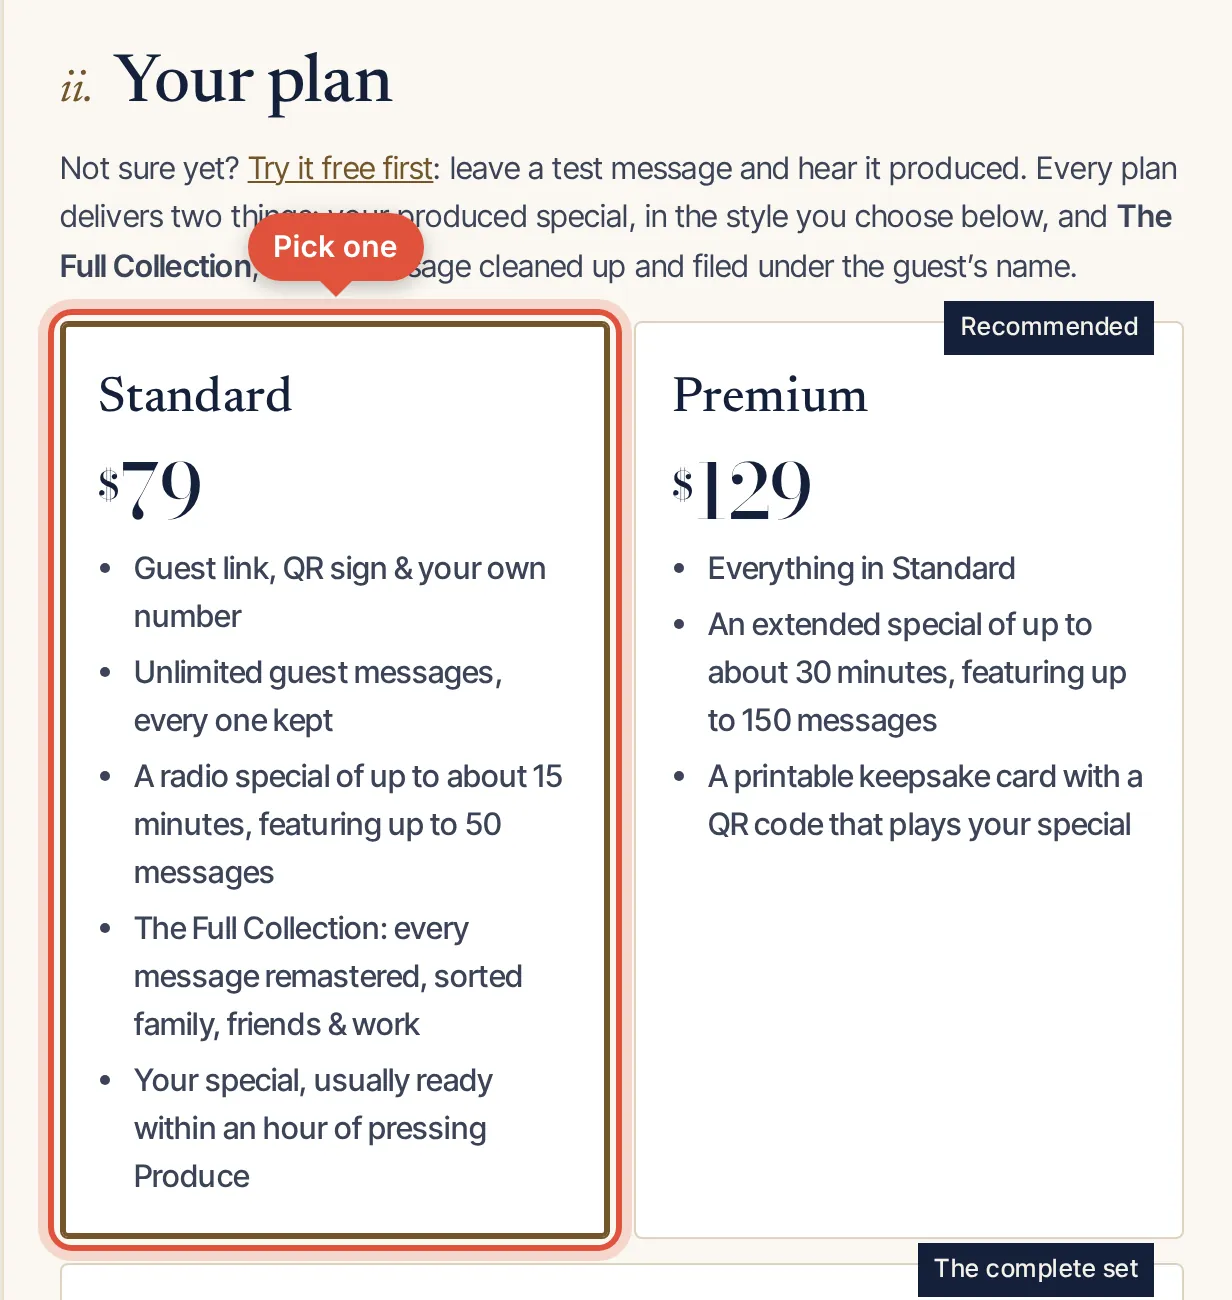
Choose your plan

  1. Read the plan cards. Each one lists exactly what you get.
  2. Tap the one you want. Both plans include video messages, the video show and iPad kiosk mode.

You’re done when one plan is highlighted.

Choose your plan on the Start page. Each card lists exactly what is included.

Step 3About 1 minute

Check out

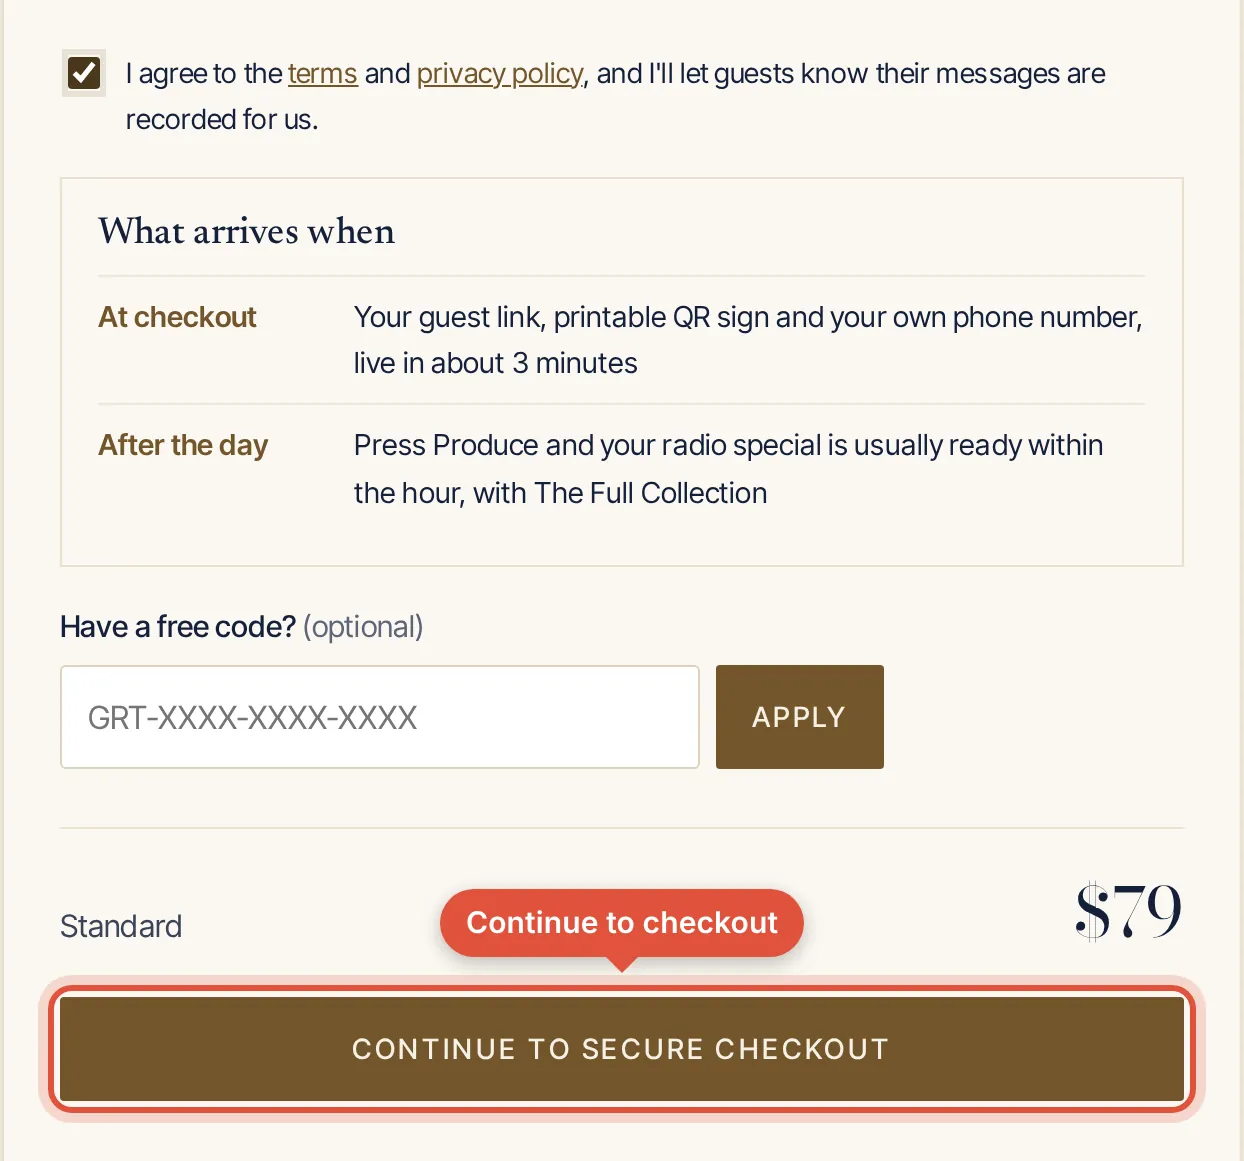
  1. Tick the box to agree to the terms and to let guests know their messages are recorded for you.
  2. Tap Continue to secure checkout and pay on the secure checkout page.

You’re done when you see “The guestbook for (your names) is open.” and an email with your links arrives.

The bottom of the Start page: tick the consent box, then Continue to secure checkout.

Step 4About 10 seconds

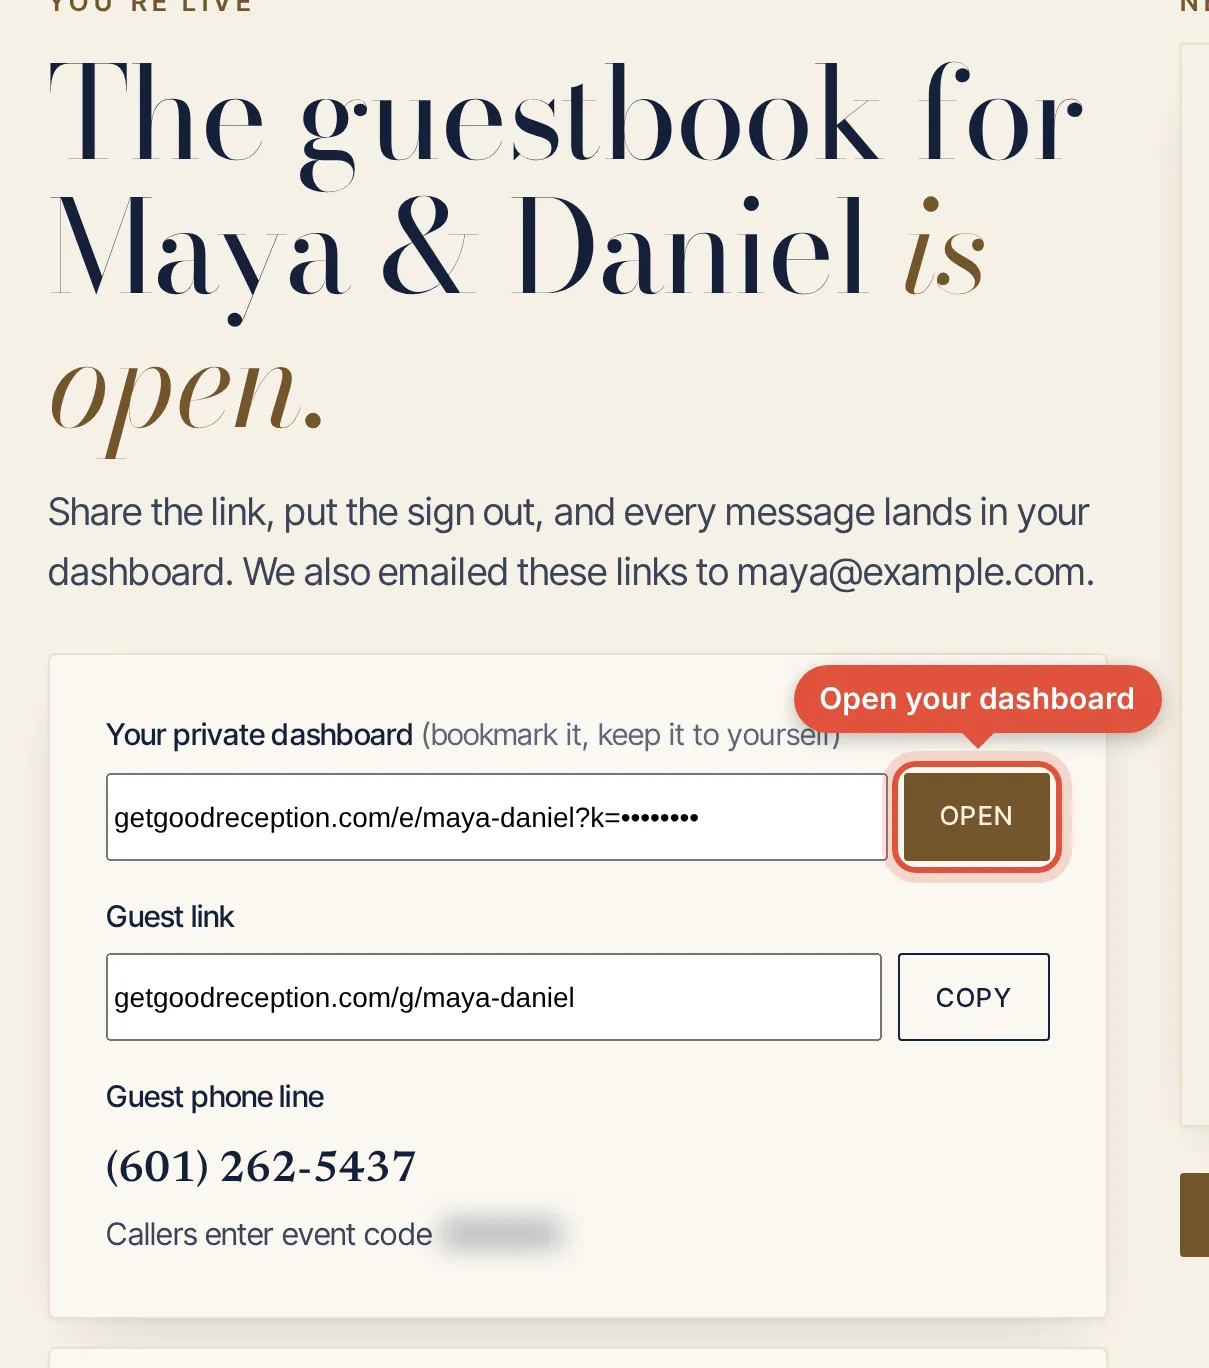
Open your dashboard

  1. On the welcome page, tap Open next to your private dashboard link.
  2. Bookmark it. It’s your private control room, so keep that link to yourself.

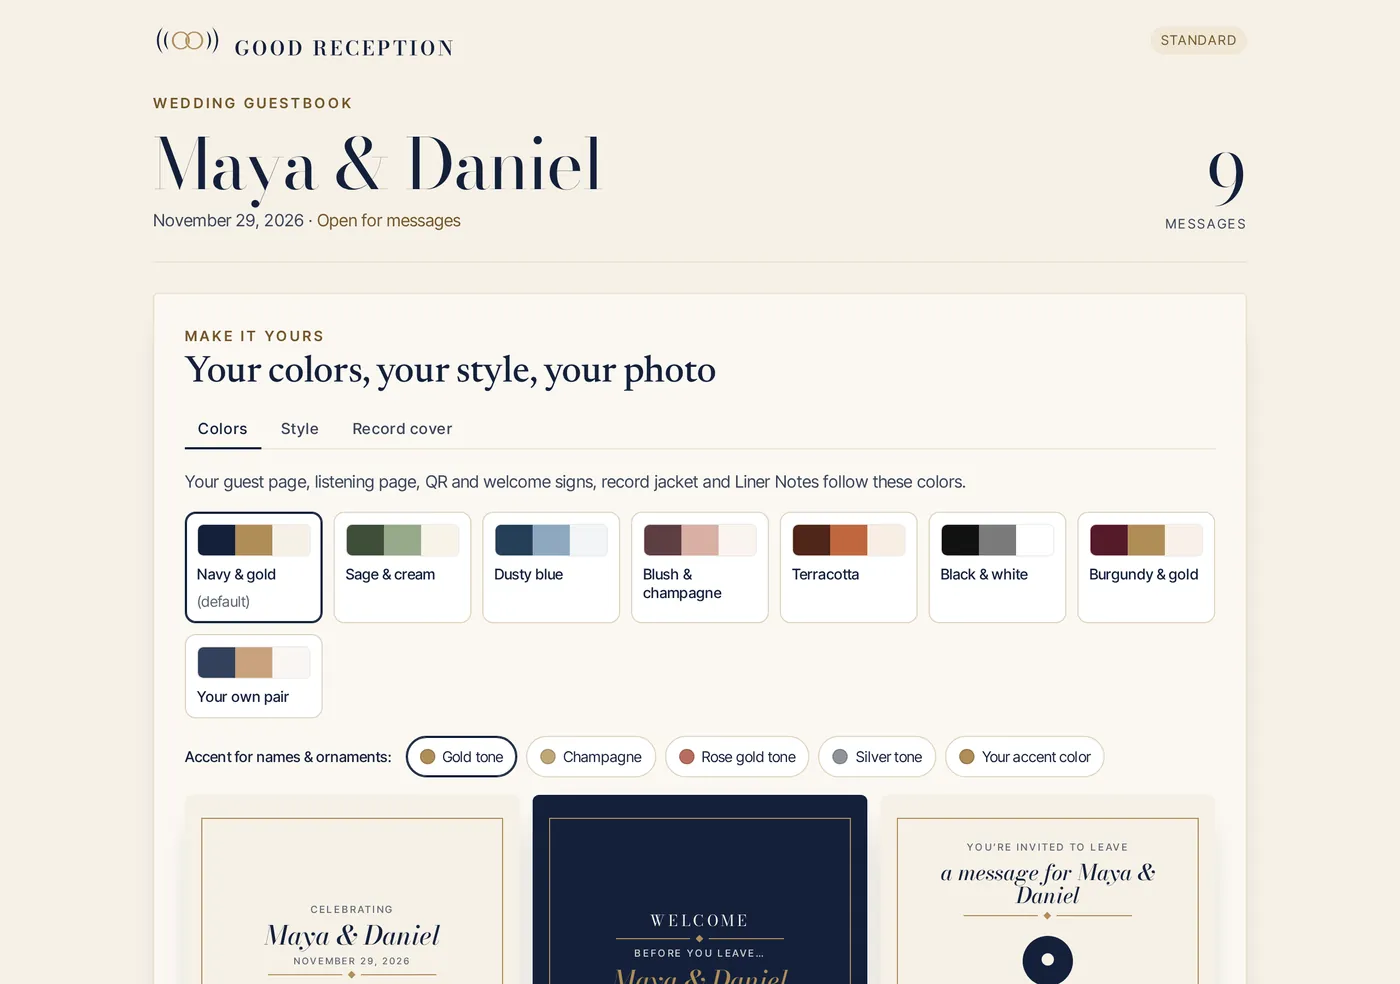
You’re done when you see your names at the top and a message count of 0.

Right after checkout: your guestbook is open, with your private dashboard link, the guest link and the guest phone line.
The top of the host dashboard for Maya & Daniel, showing how many messages have come in.

Step 5About 2 minutes

Share your guest link

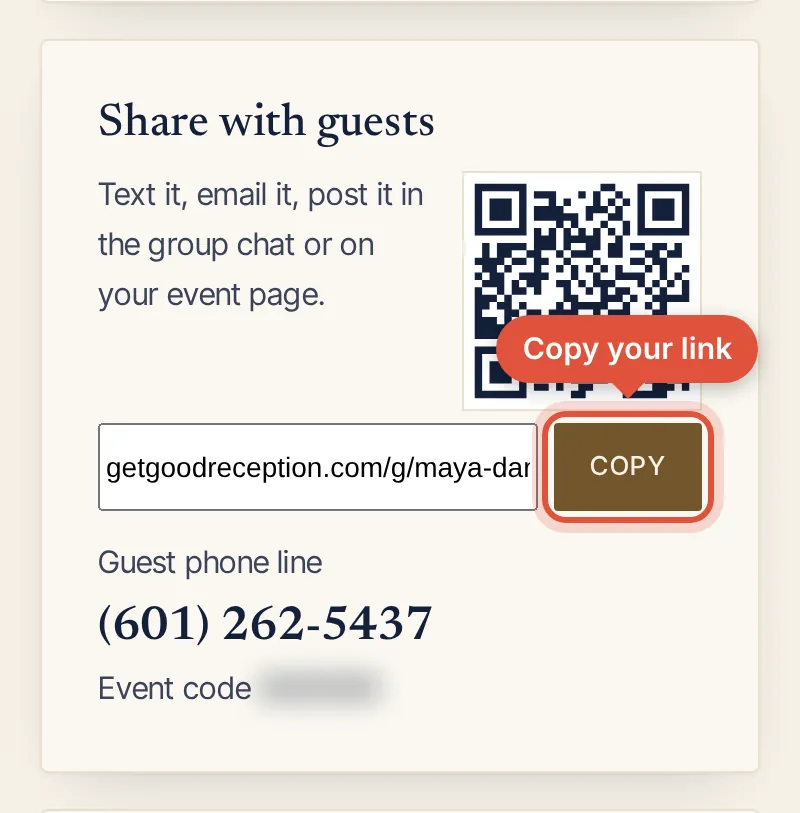
  1. Tap Copy on the “Share with guests” card.
  2. Paste it into your group chat, invitation or wedding website.
  3. Print the QR sign (8×10 or 5×7 PDF from your welcome page or dashboard) for the tables.

No smartphone? Guests can also call the number on this card and enter your event code. The card shows both.

You’re done when you open the link on your own phone and see your names on the guest page.

The Share with guests card: a QR code, your guest link with a Copy button, and the guest phone line.

Step 6About 15 minutes, the day before

Set up the iPad kiosk (optional)

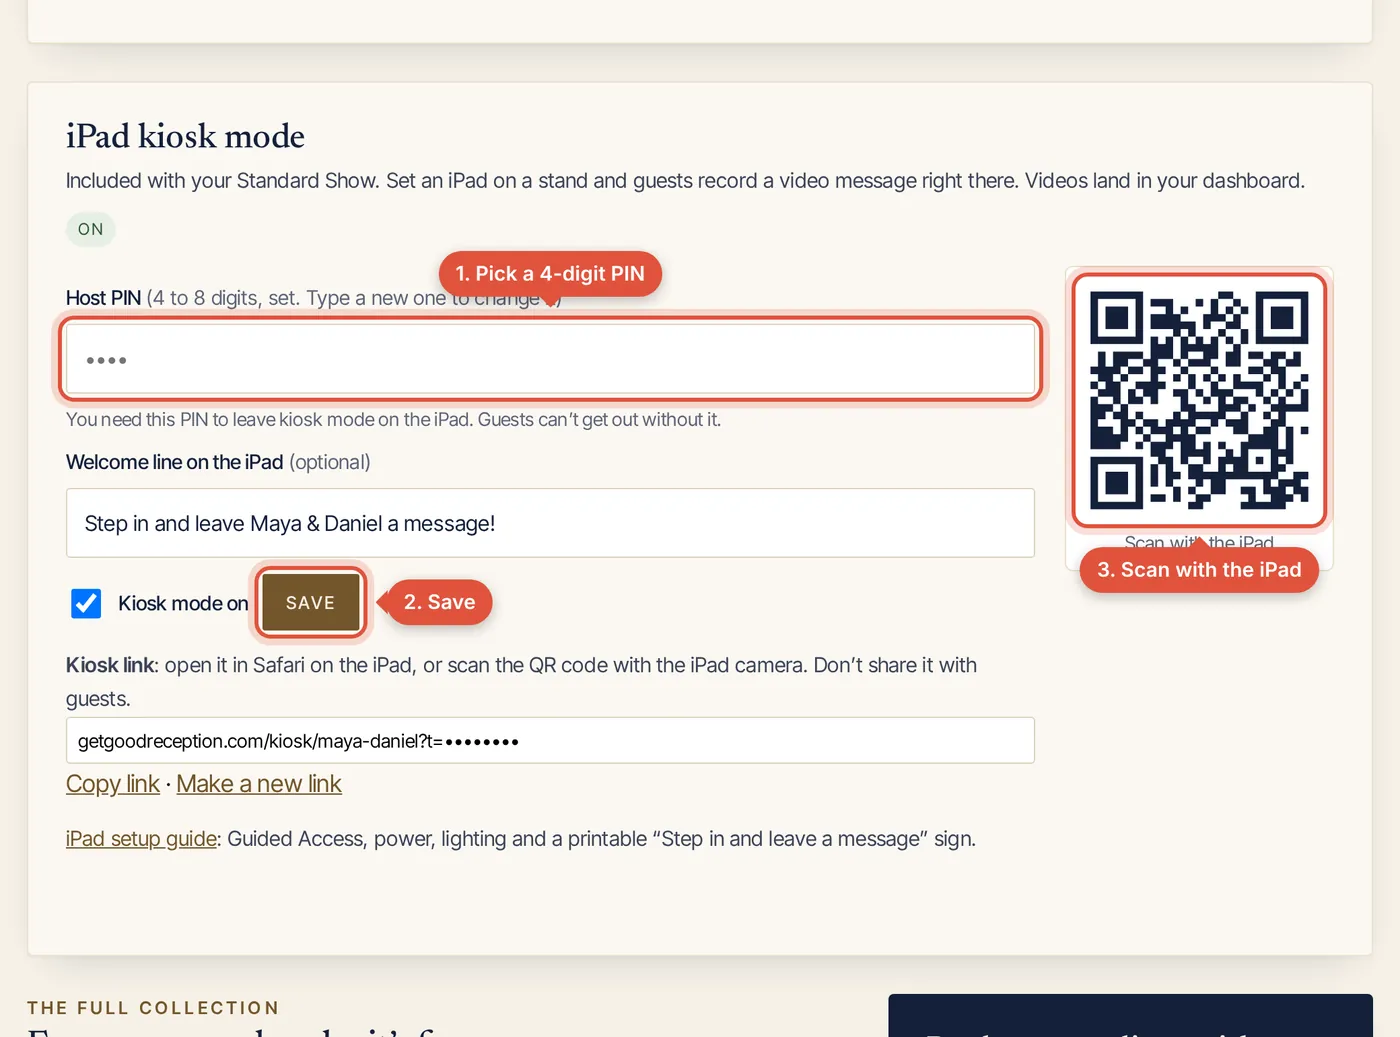
  1. In the “iPad kiosk mode” card, pick a PIN (4 to 8 digits), tick Kiosk mode on and tap Save.
  2. On the iPad, point the Camera app at the QR code in that card, open the link and tap Allow for camera and microphone.
  3. Lock it in place with Guided Access. Our iPad setup guide walks you through it, plus Add to Home Screen.

Included with both plans. You bring the iPad, a stand and a charger.

You’re done when a test video you record on the iPad shows up in your dashboard. You can hide it afterwards.

The iPad kiosk mode card on the dashboard: set a PIN and welcome line, save, then scan the QR code with the iPad to open the kiosk.
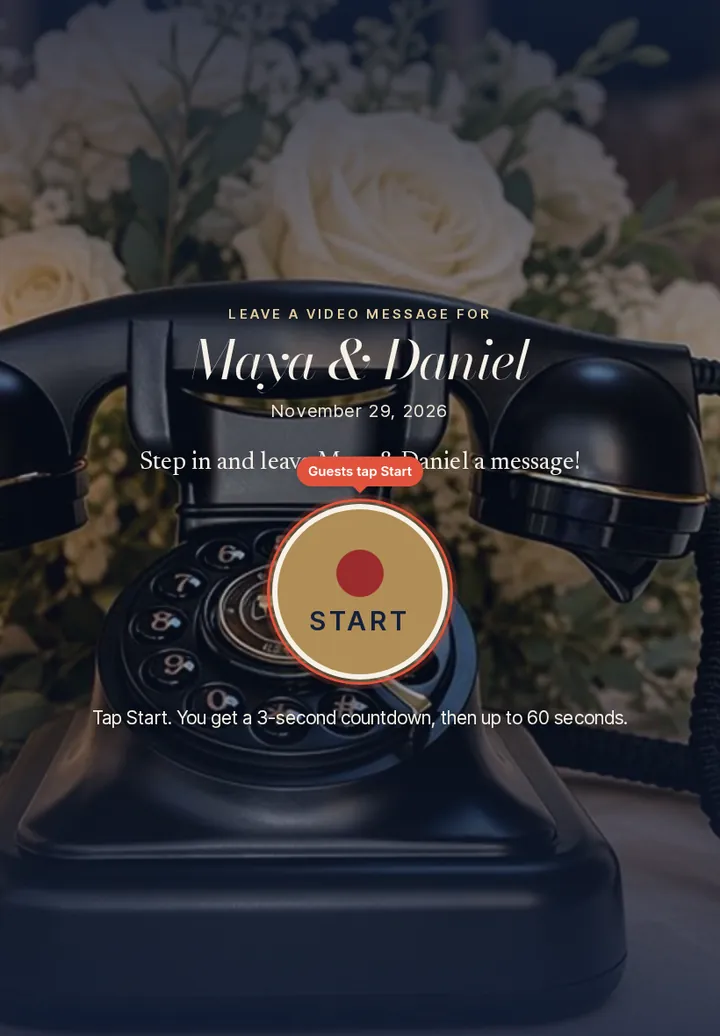
The iPad kiosk Start screen: the camera is live behind a big Start button and your welcome line.
What guests see
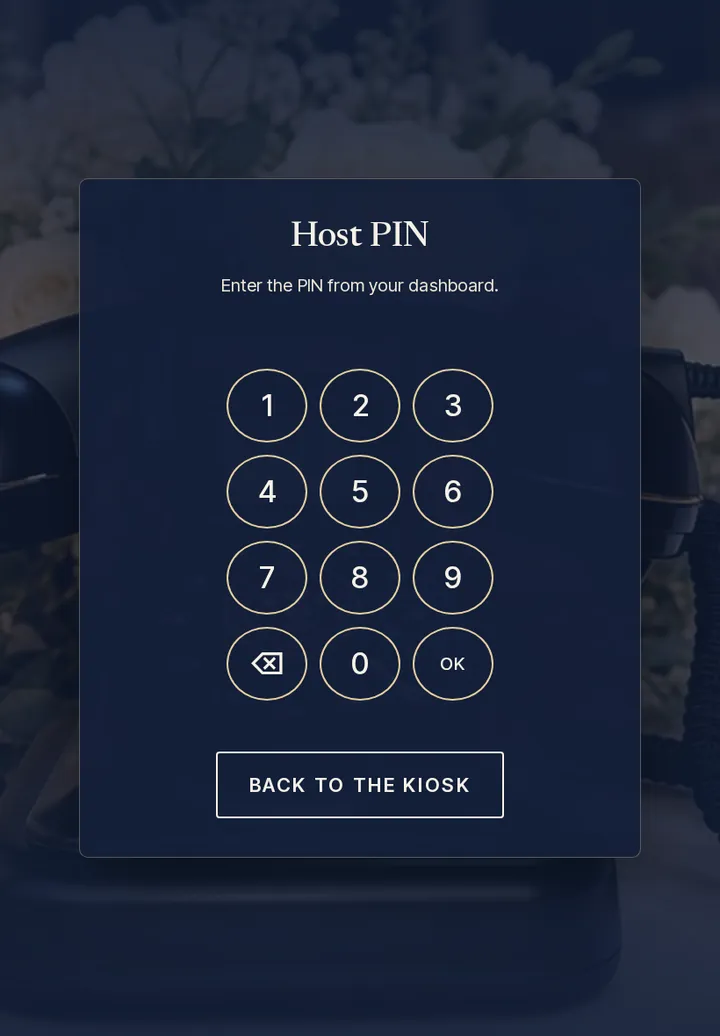
The hidden host PIN pad, opened by pressing and holding the top corner. Guests never see it.
Your PIN pad: press and hold the top-right corner for 2 seconds

Step 7Whenever you like

Watch messages come in

  1. Open your dashboard any time before, during or after the event.
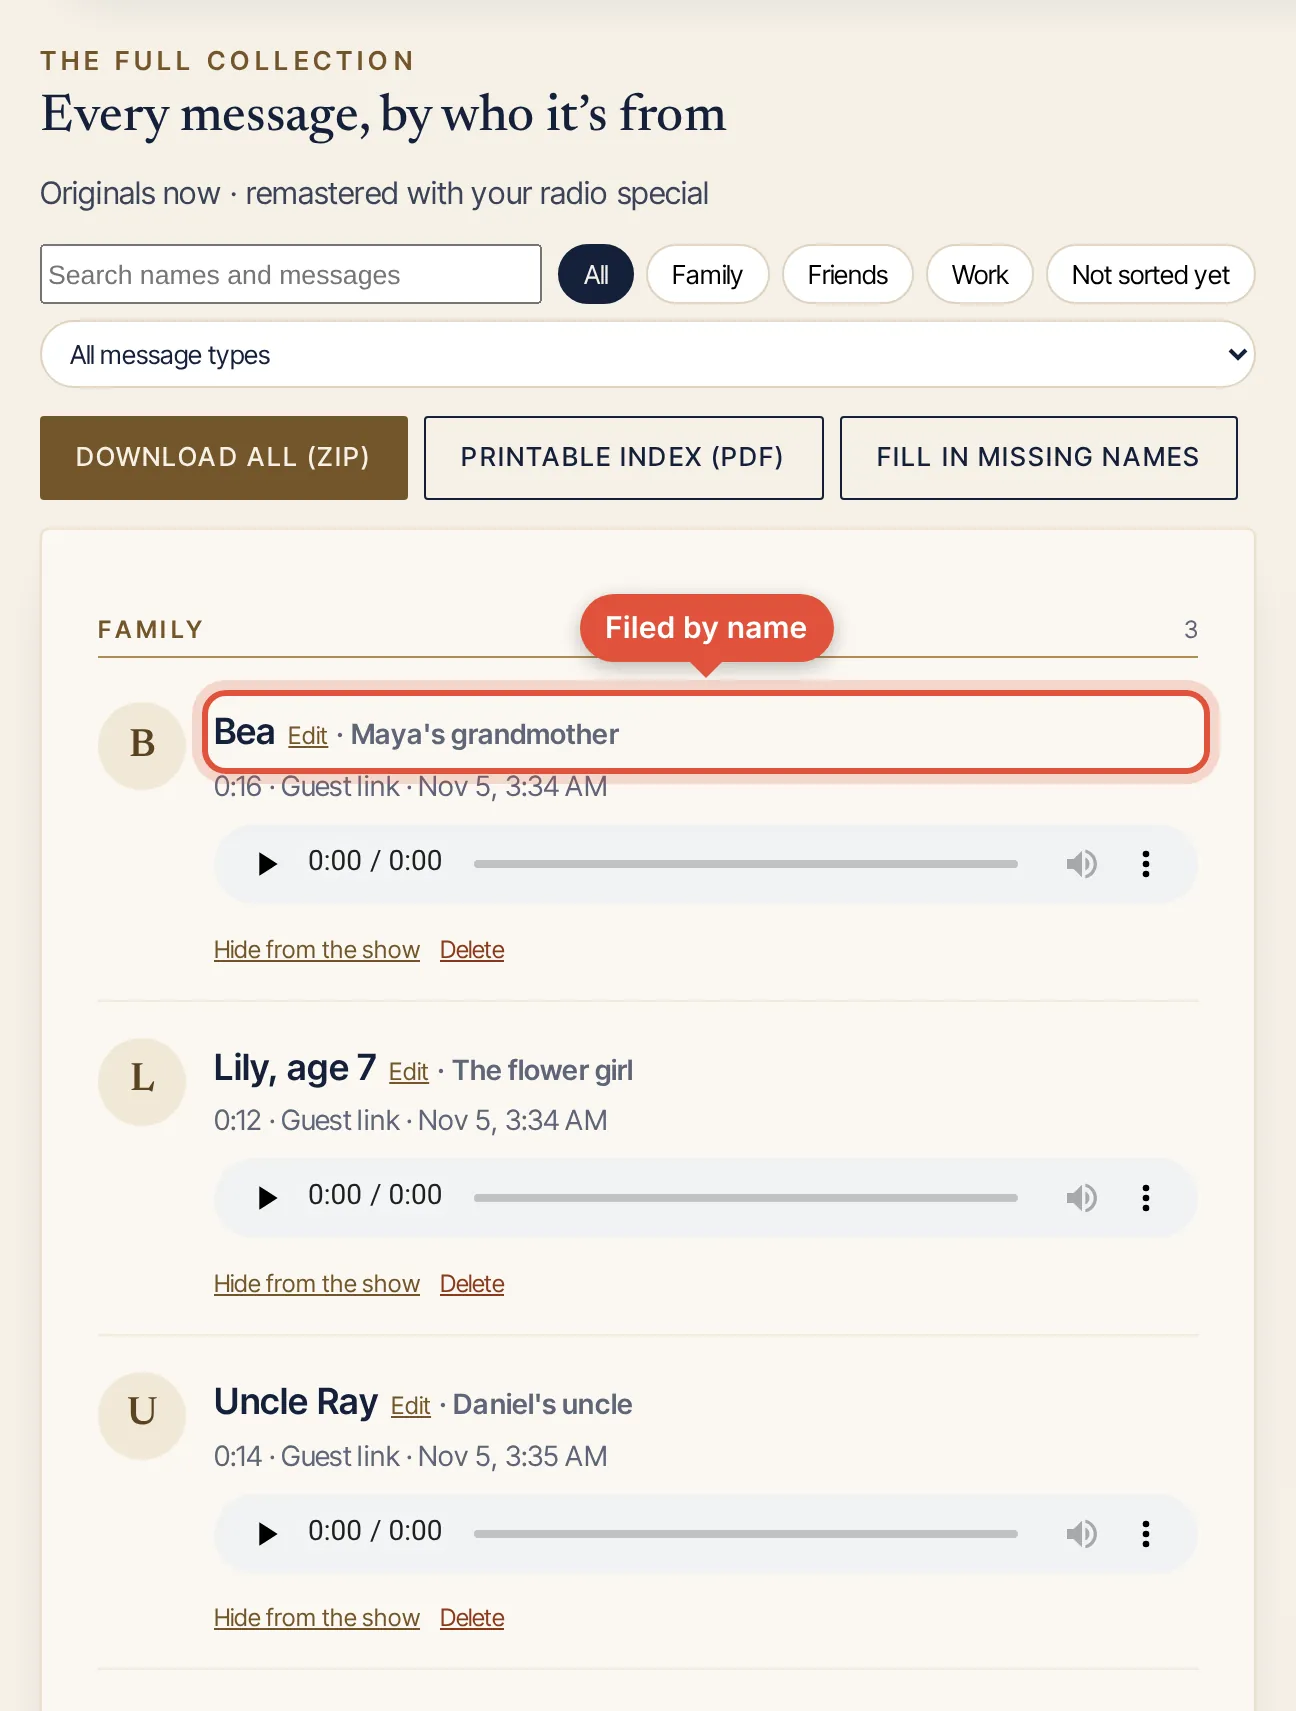
  2. Tap play on any message. Each one is filed under Family, Friends or Work, with the guest’s name.
  3. Tap Hide from the show on anything you’d rather leave out. It stays in your collection.

You’re done when you’ve heard your first message. (Nothing else to do here. It fills itself.)

Every message, by who it’s from: messages filed under Family, Friends and Work, each with the guest’s name and a player.

Step 8About 30 seconds, after the event

Press Produce

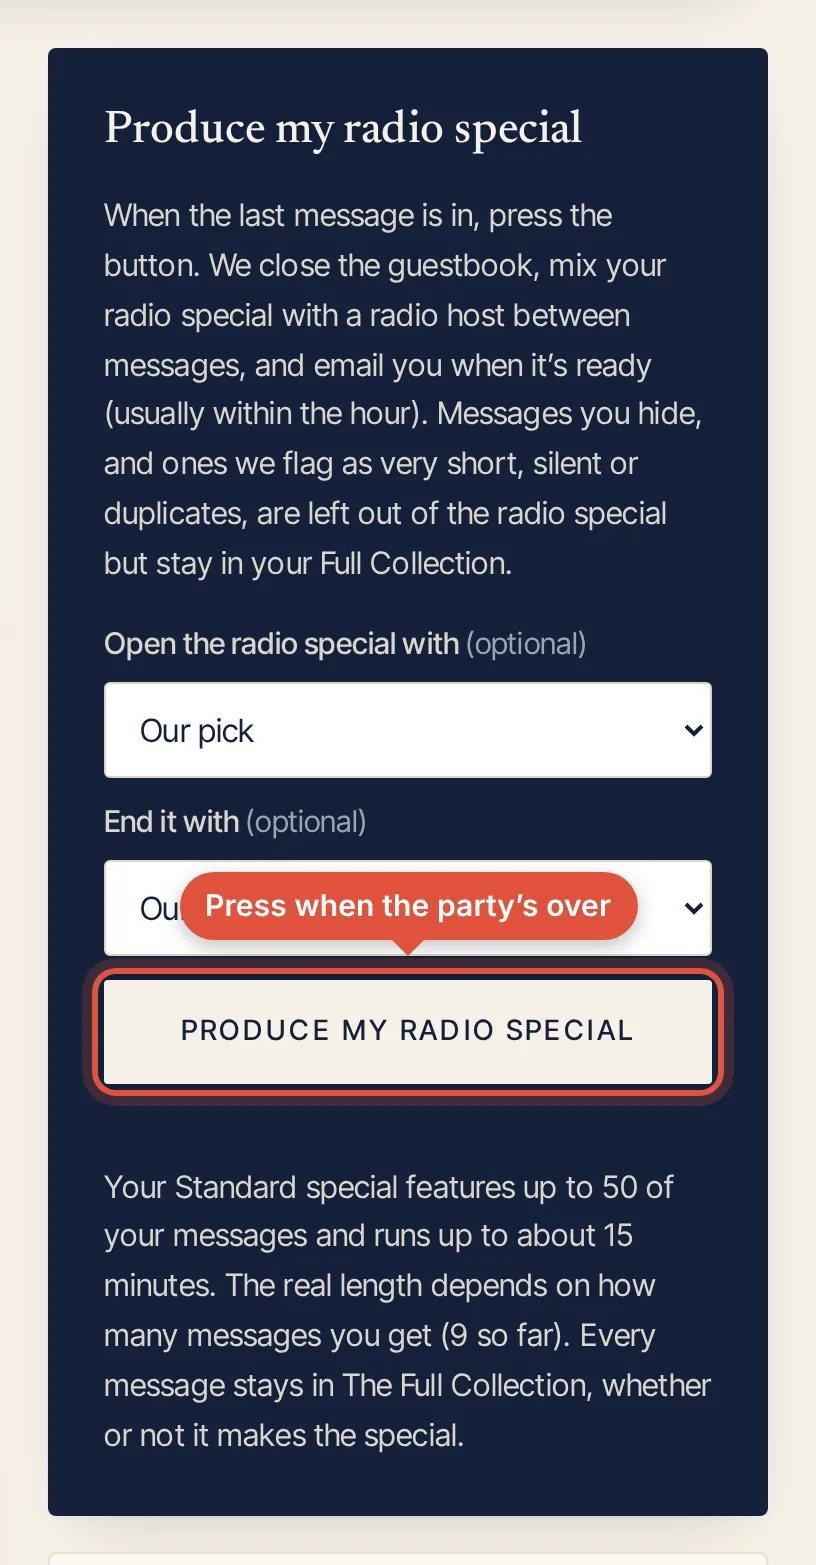
  1. Pick which message opens and which closes the show, or leave it on “Our pick”.
  2. Tap Produce my radio special. We close the guestbook and produce your special.
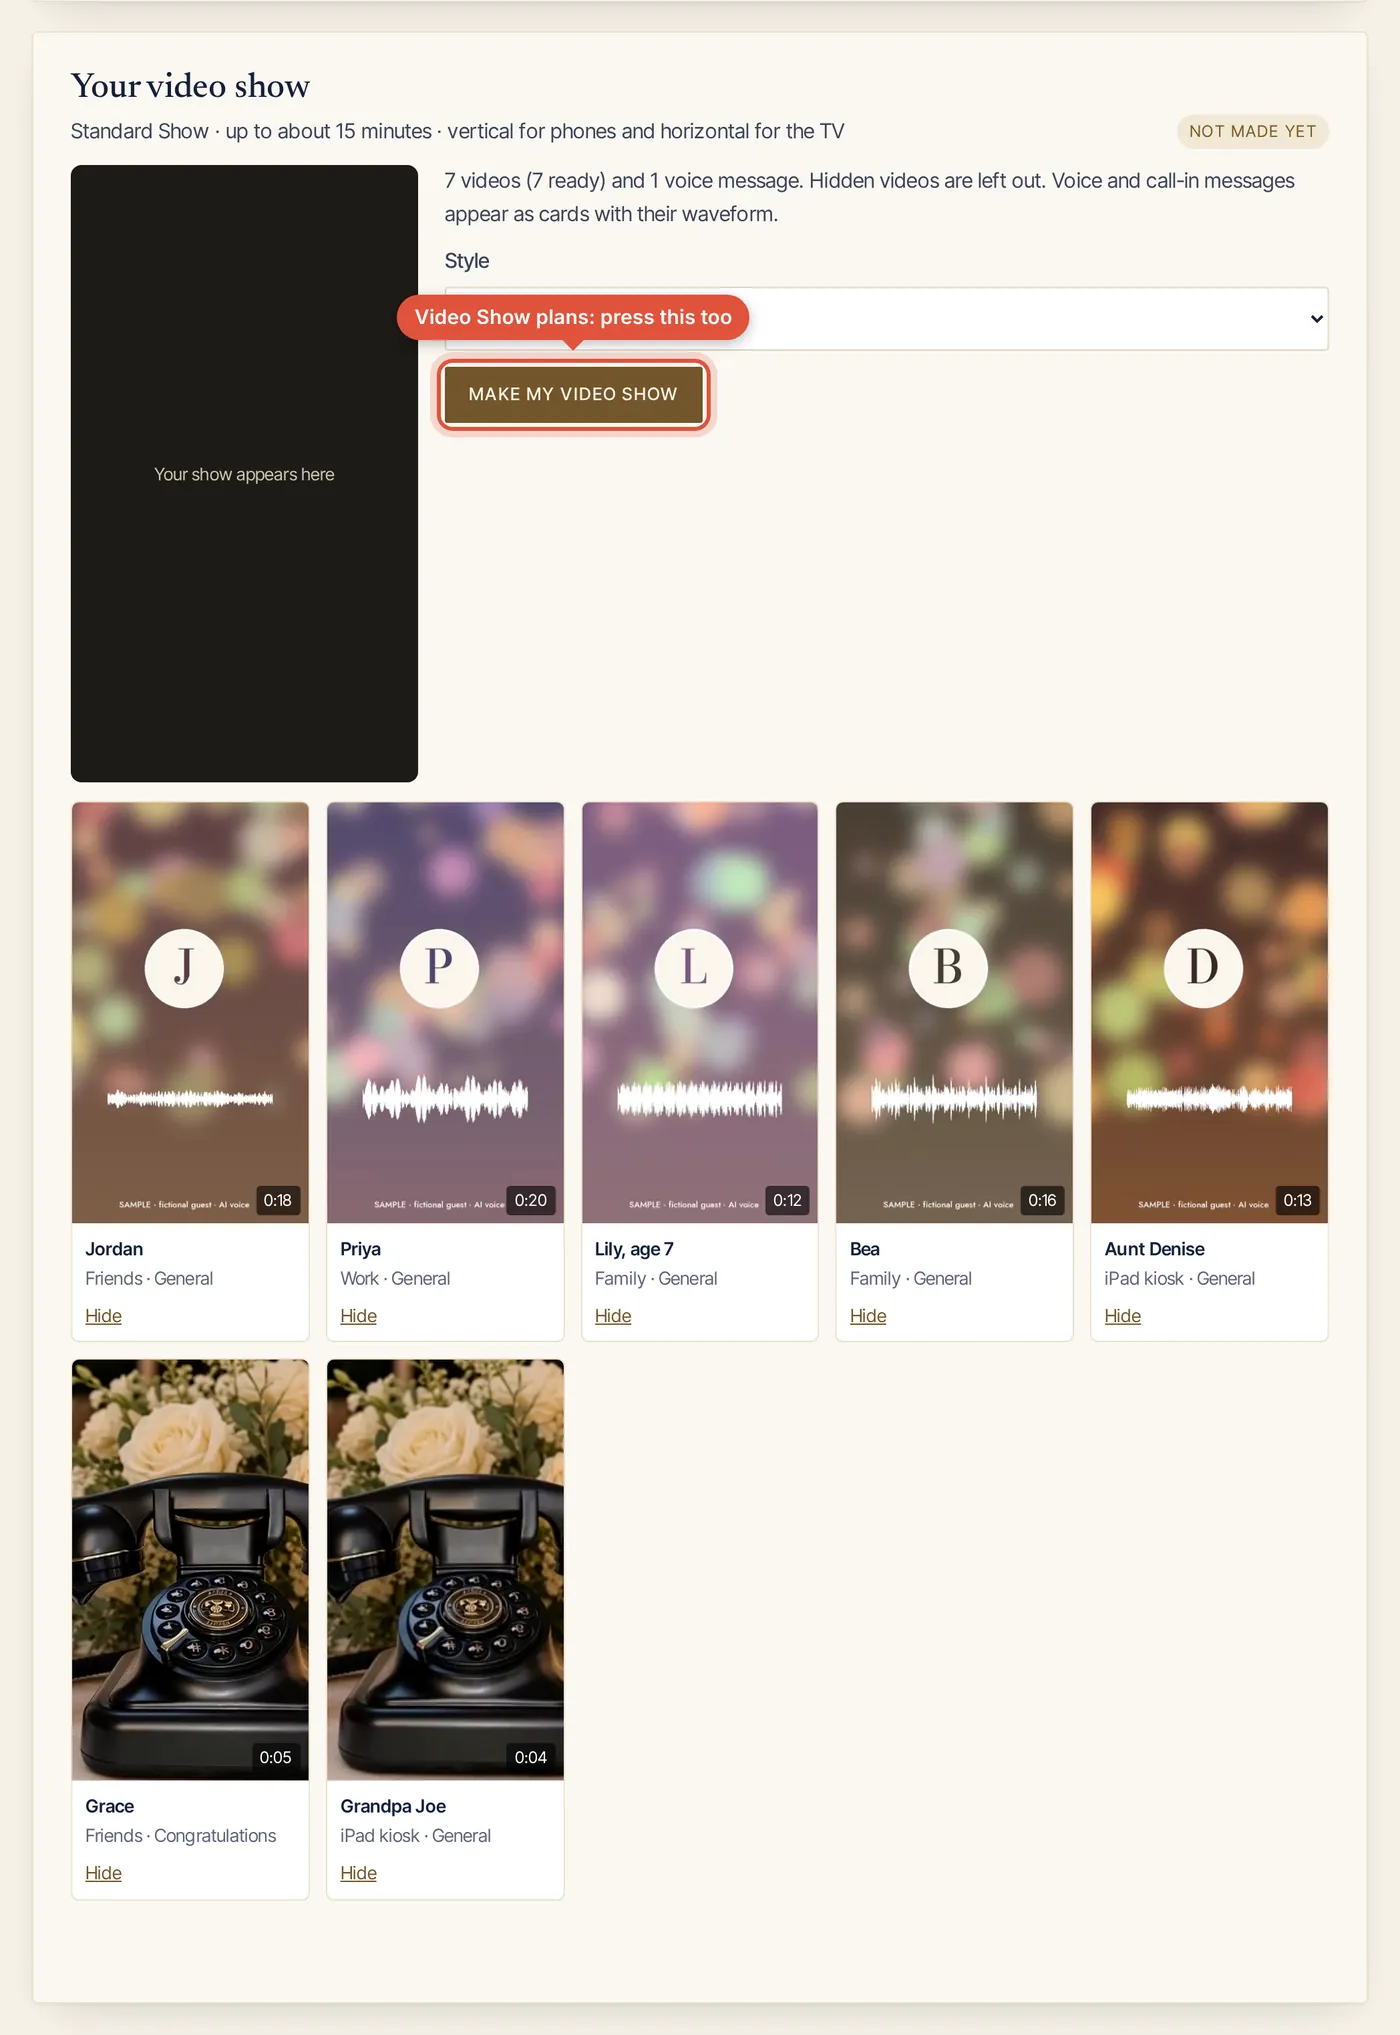
  3. On a Video Show plan, also tap Make my video show.

You’re done when the card says your show is ready. We email you too. After you press Produce or Make my video show, it usually arrives in 24 to 72 hours.

The Produce my radio special card: choose how it opens and ends, then press Produce my radio special.
The Your video show card on Video Show plans, with the Make my video show button.

Step 9As long as you like

Play, share and download

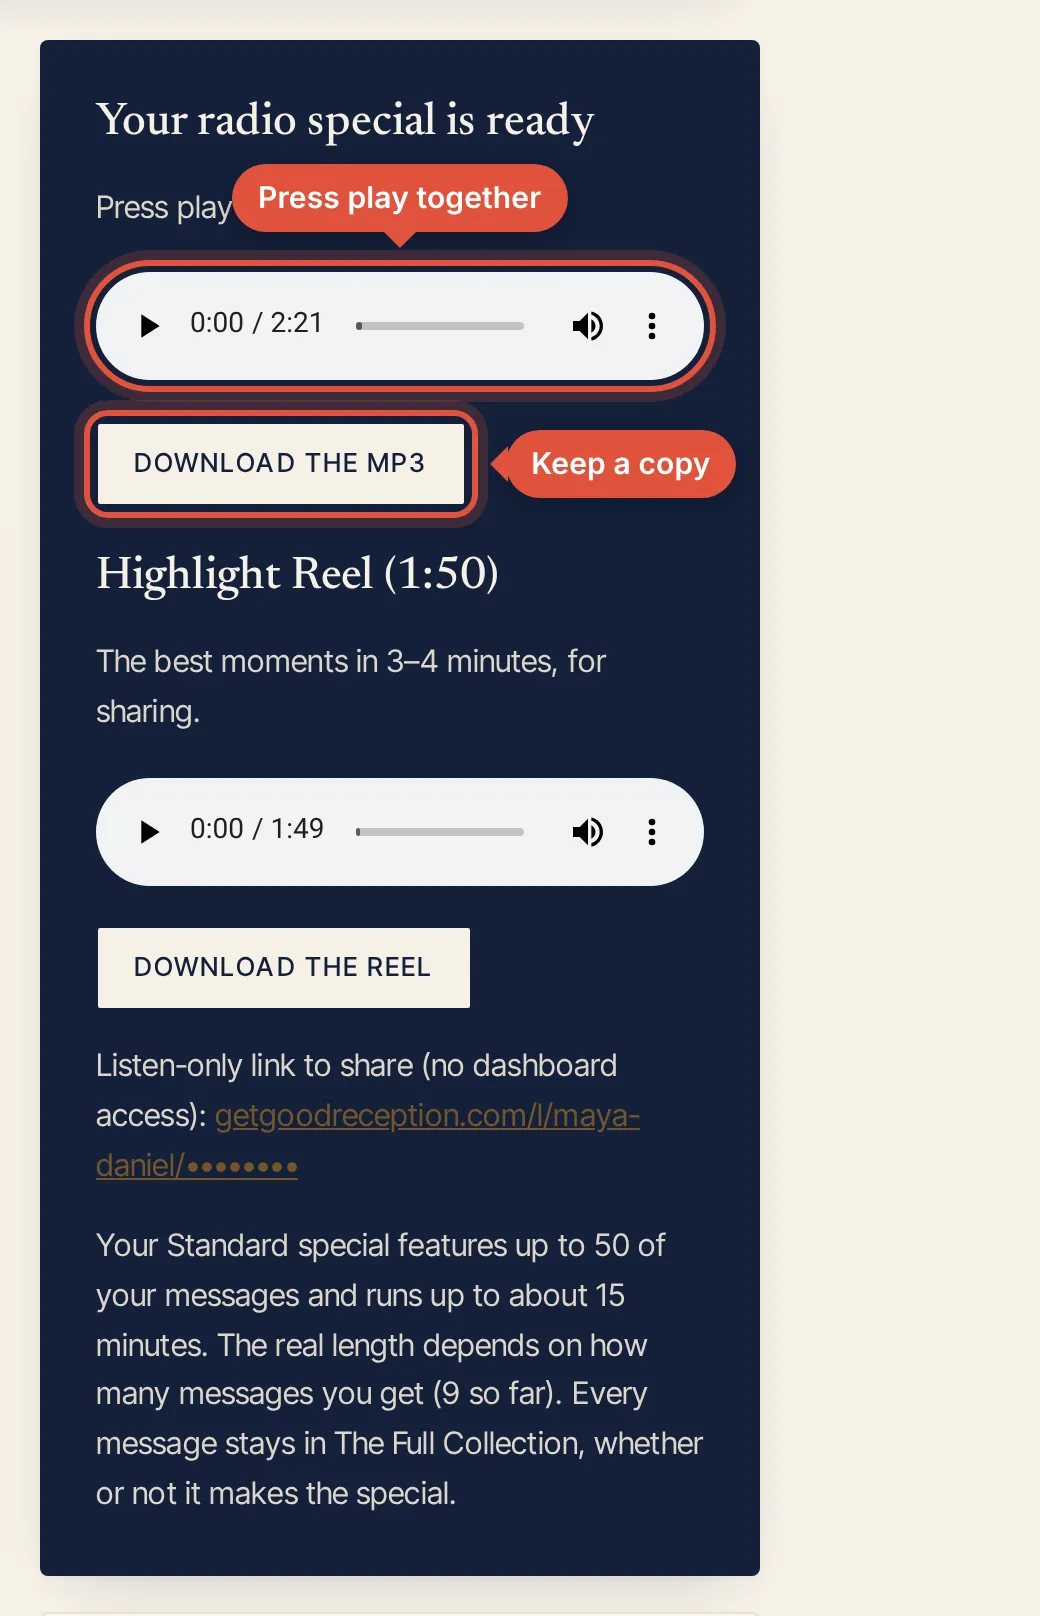
  1. Press play on your radio special or video show, right on your dashboard.
  2. Share the listen-only link (radio special) or the share page link (video show). People with the link can listen or watch, but can’t open your dashboard.
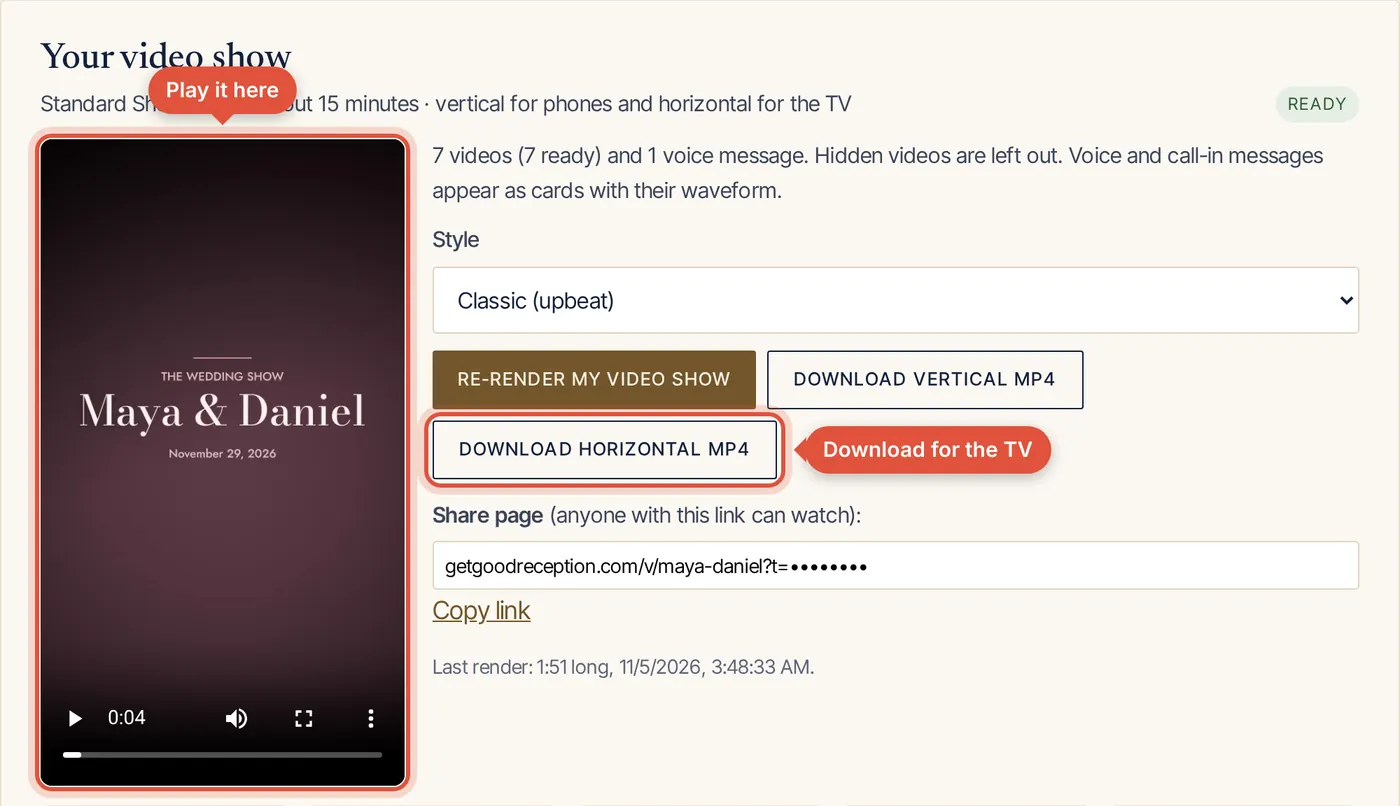
  3. Tap Download the MP3 or Download horizontal MP4 for the TV, then Download all (ZIP) for every original message.

You’re done when the files are saved on your own computer. That’s it. You ran it like a pro.

A finished radio special on the dashboard: a player, Download the MP3, the Highlight Reel and a listen-only link to share.
A finished video show on the dashboard: a player with the title card, download buttons for the vertical and horizontal versions, and a share link.

Part 2 · For guests

What your guests do. About a minute.

Send them this page if they ask. There’s nothing to install.

Step AAbout 5 seconds

Scan the QR code or tap the link

  1. Point the phone’s camera at the QR sign and tap the link that pops up, or tap the link someone sent.
  2. No app and no sign-up. It opens in the phone’s browser.

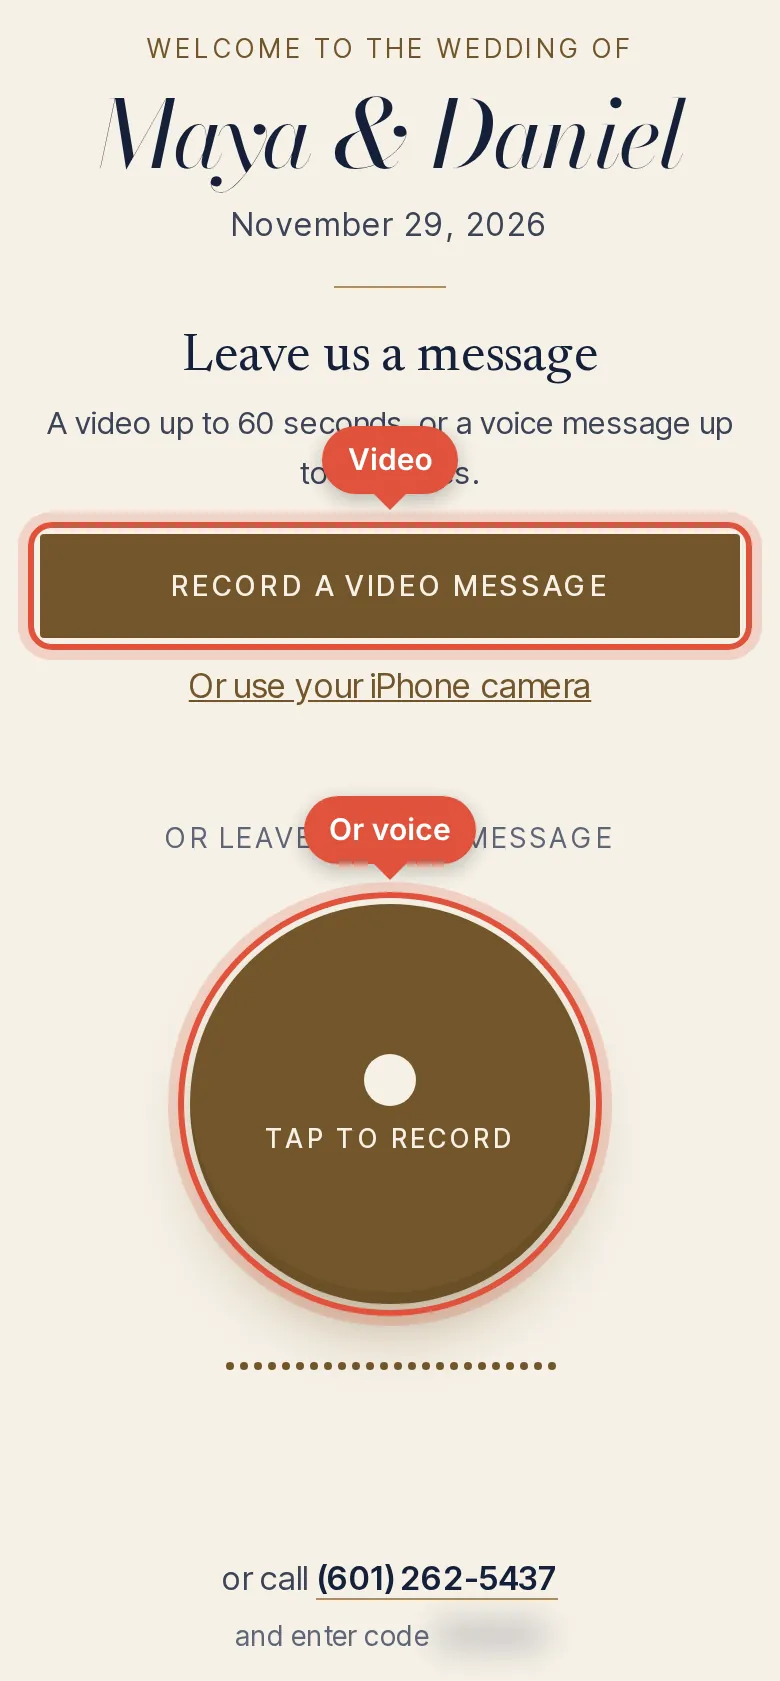
You’re done when you see the couple’s names and the record buttons.

The guest page on a phone: Maya & Daniel’s names, a Record a video message button and a round Tap to record button for voice.

Step BUp to 60 seconds

Tap Record a video message

  1. Tap Record a video message, then Allow camera and microphone if the phone asks.
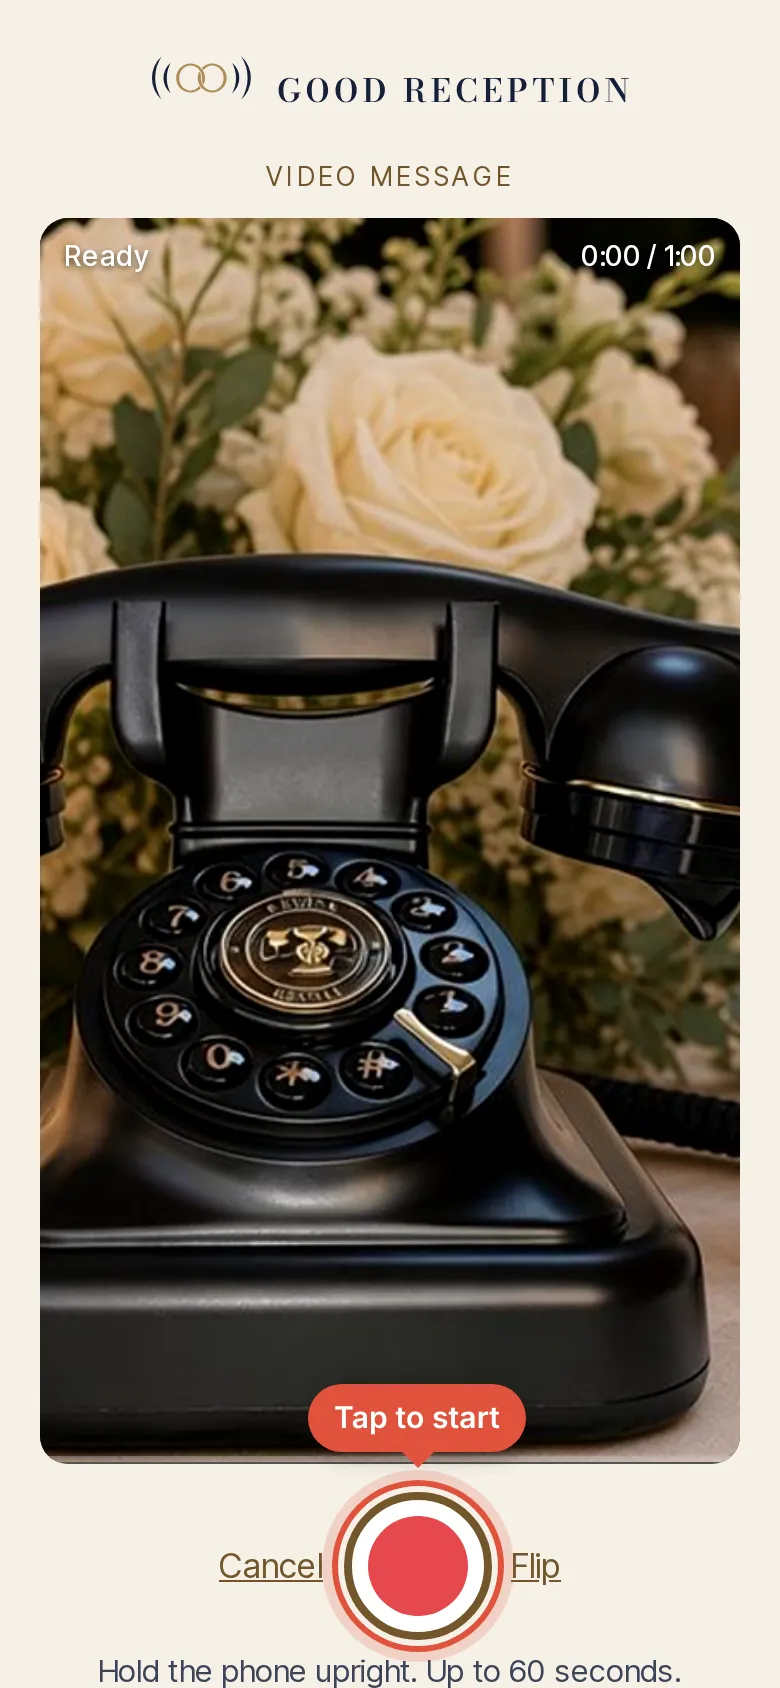
  2. Hold the phone upright and tap the round button to start.
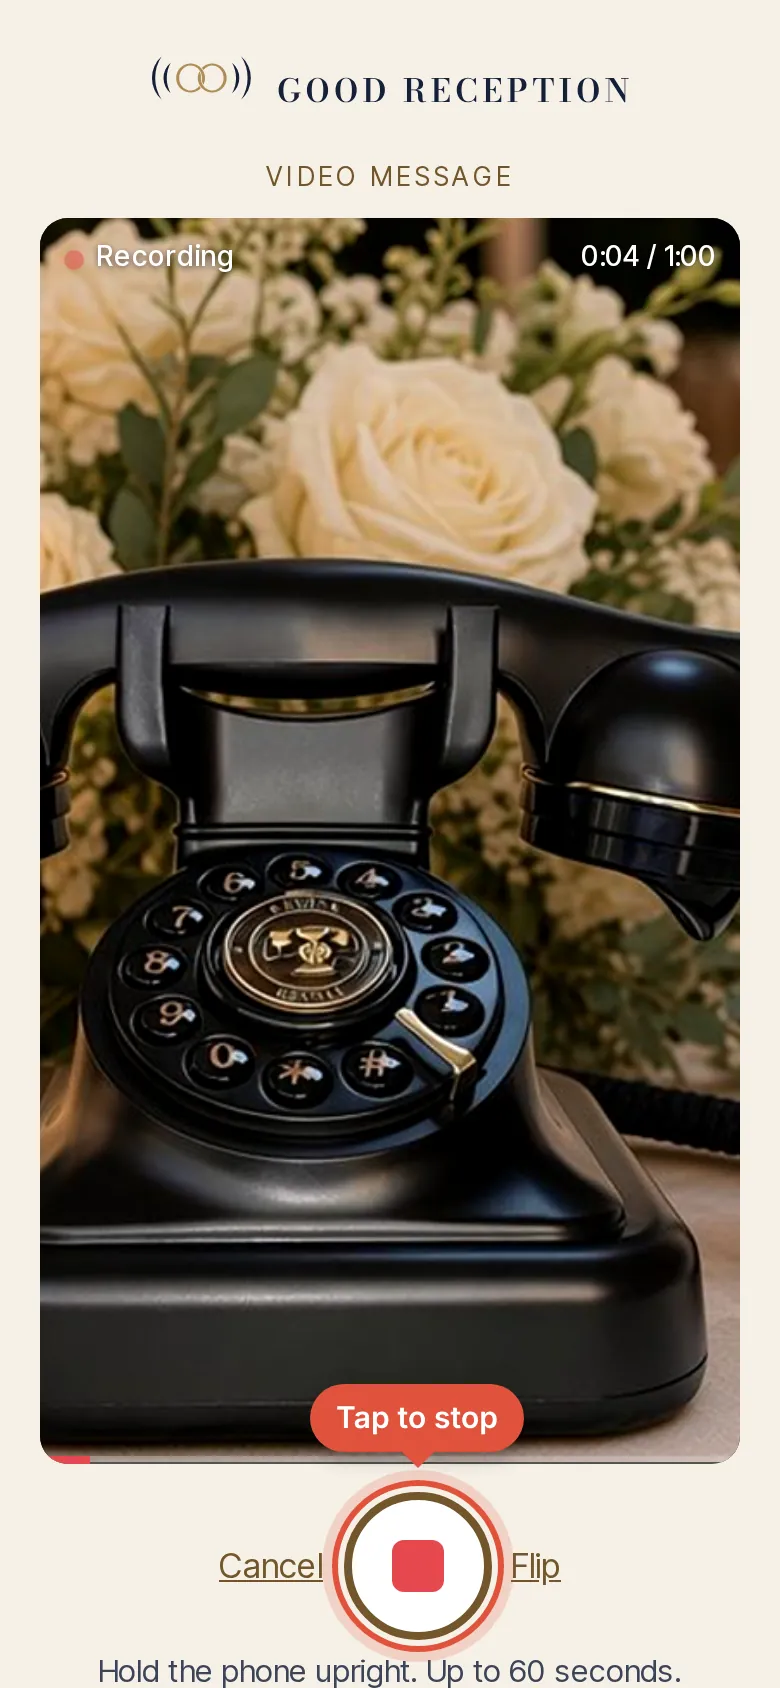
  3. Tap it again to stop.

You’re done when the timer stops and you see your video.

The video recorder on a phone, camera on, with a big round record button highlighted.
Recording in progress: a red Recording label, a timer counting up to 1:00 and the stop button highlighted.

Step CAbout 30 seconds

Review and send

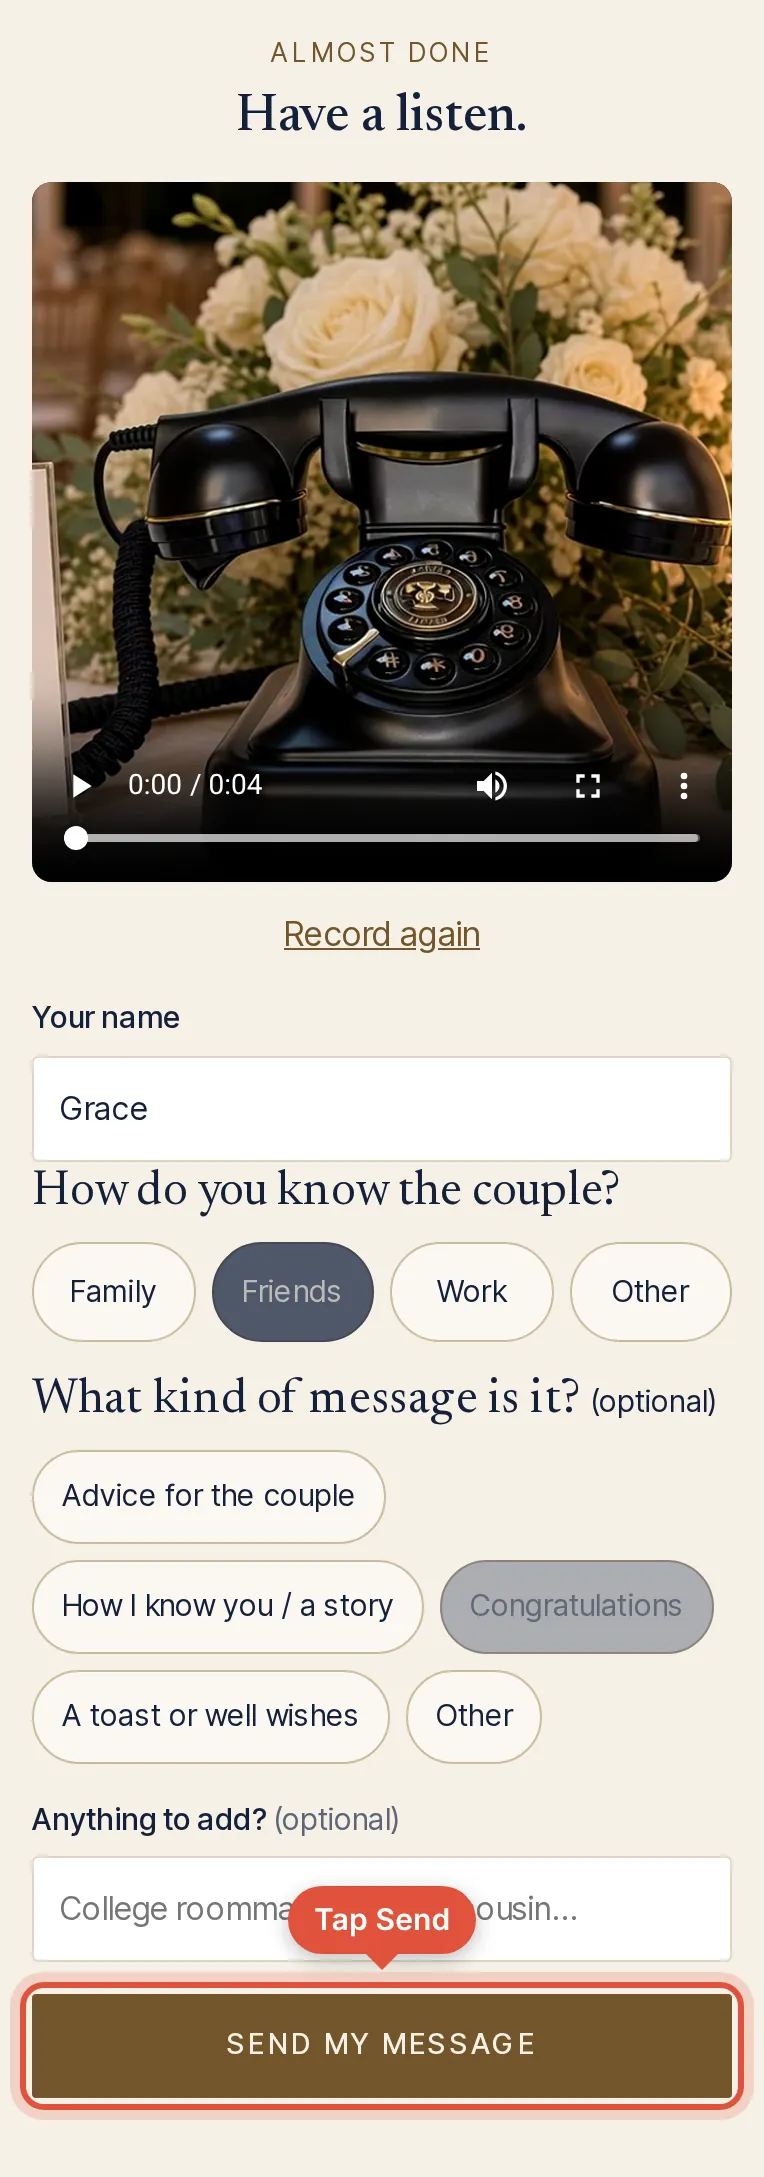
  1. Watch it back. Tap Record again if you want another take.
  2. Type your name and tap how you know the couple.
  3. Tap Send my message.

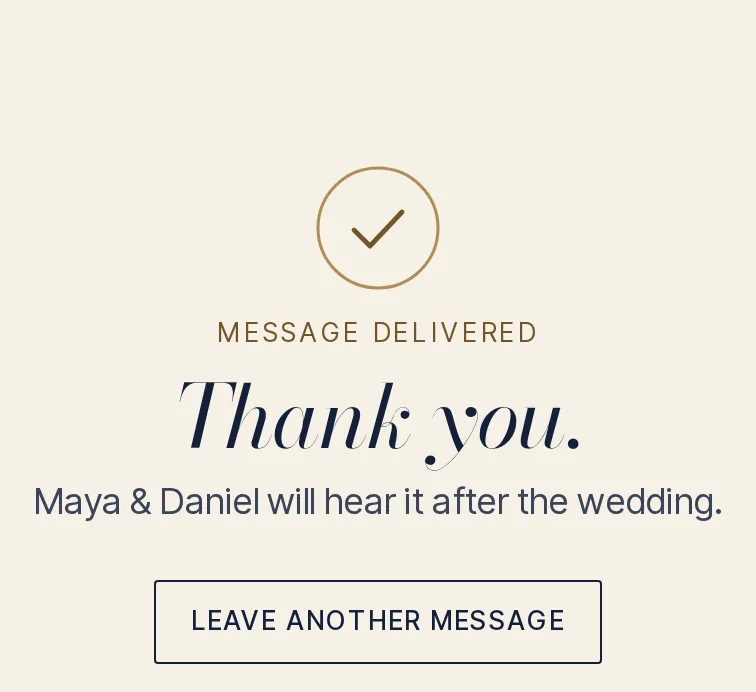
You’re done when you see “Thank you.” It’s safely in.

The review screen: play back the video, Record again, then your name, how you know the couple, and a Send my message button highlighted.
The thank-you screen after sending: the message is safely in.

Step DUp to 3 minutes

Prefer voice? Tap the round button

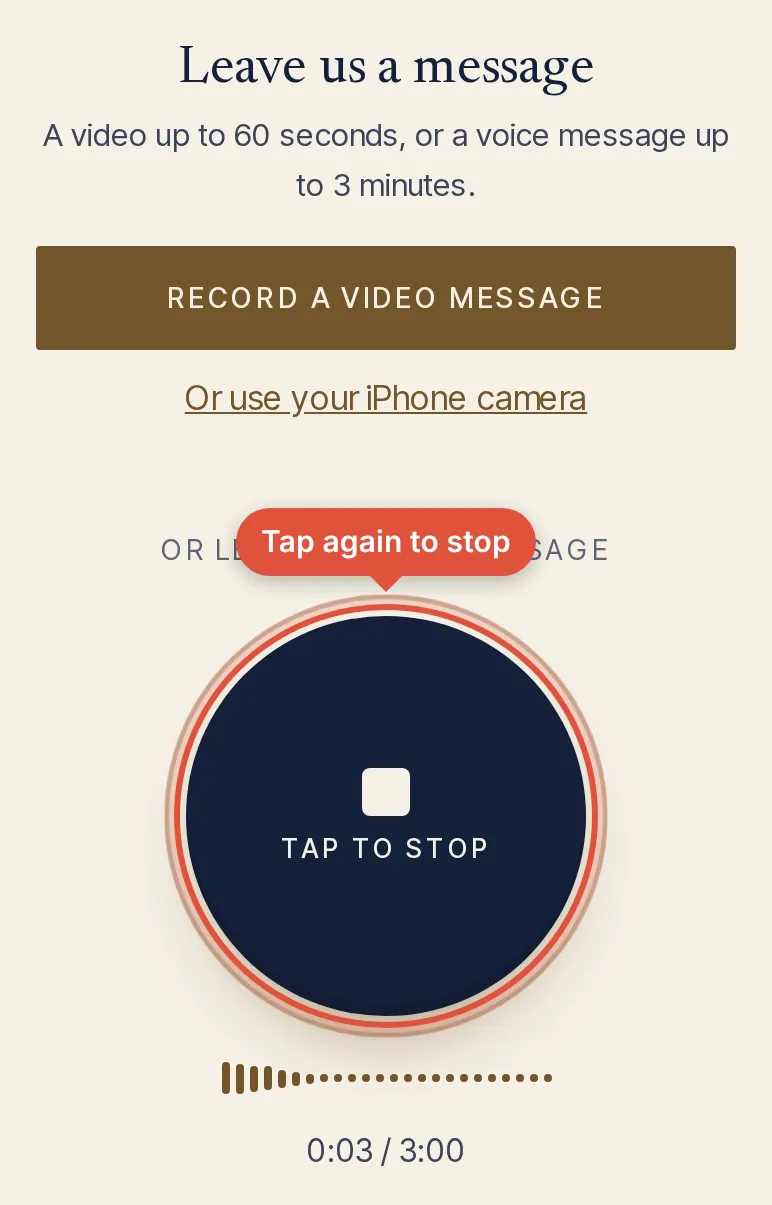
  1. Tap the big round Tap to record button and talk.
  2. Tap it again to stop, then review and send the same way.
  3. Rather write? There’s a link to type a message instead.

You’re done when you see “Thank you.”

Recording a voice message: the round button shows it is recording, with a live level meter and timer.

Step EAbout a minute

At an iPad kiosk: tap Start

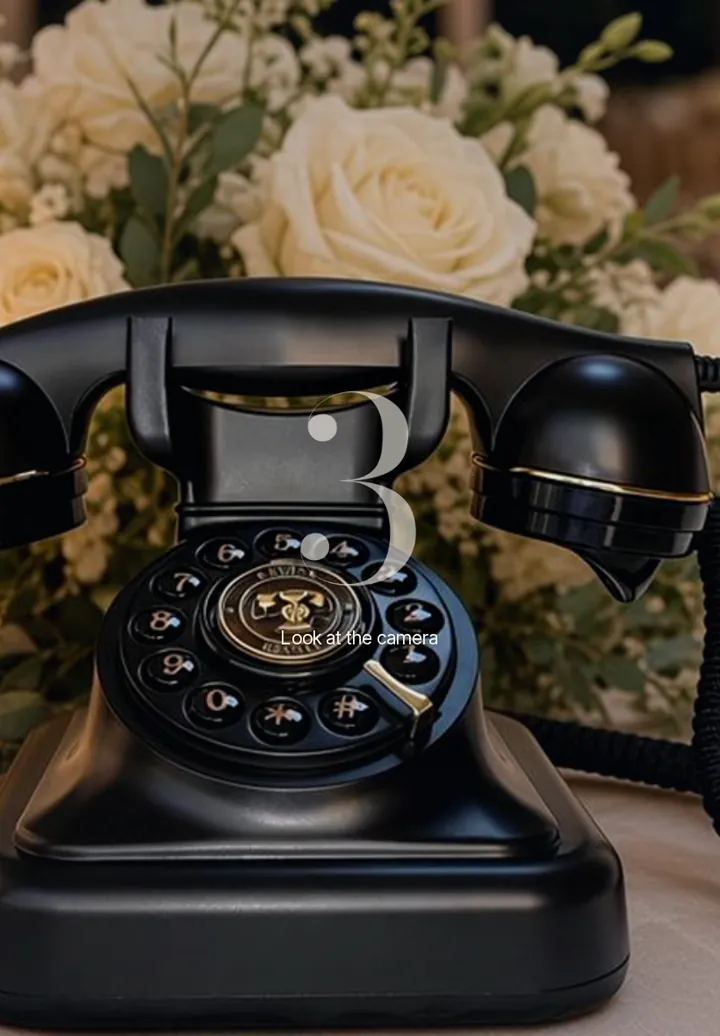
  1. Tap Start. A 3-2-1 countdown gives you a second to smile.
  2. Talk, then tap Stop.
  3. Tap Send, add your name or skip. The iPad resets for the next guest by itself.

You’re done when you see “Thank you” on the iPad.

The iPad kiosk Start screen: the camera is live behind a big Start button and your welcome line.
Tap Start
A 3-2-1 countdown on the iPad before recording begins.
3-2-1
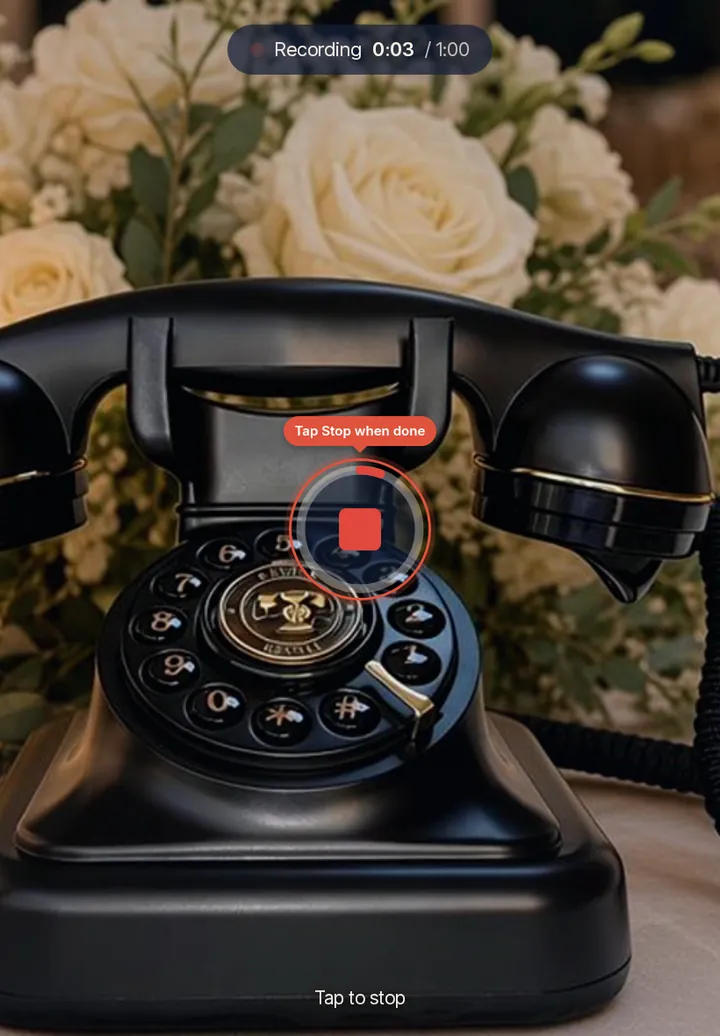
Recording on the iPad, with a timer and a big Stop button.
Tap Stop
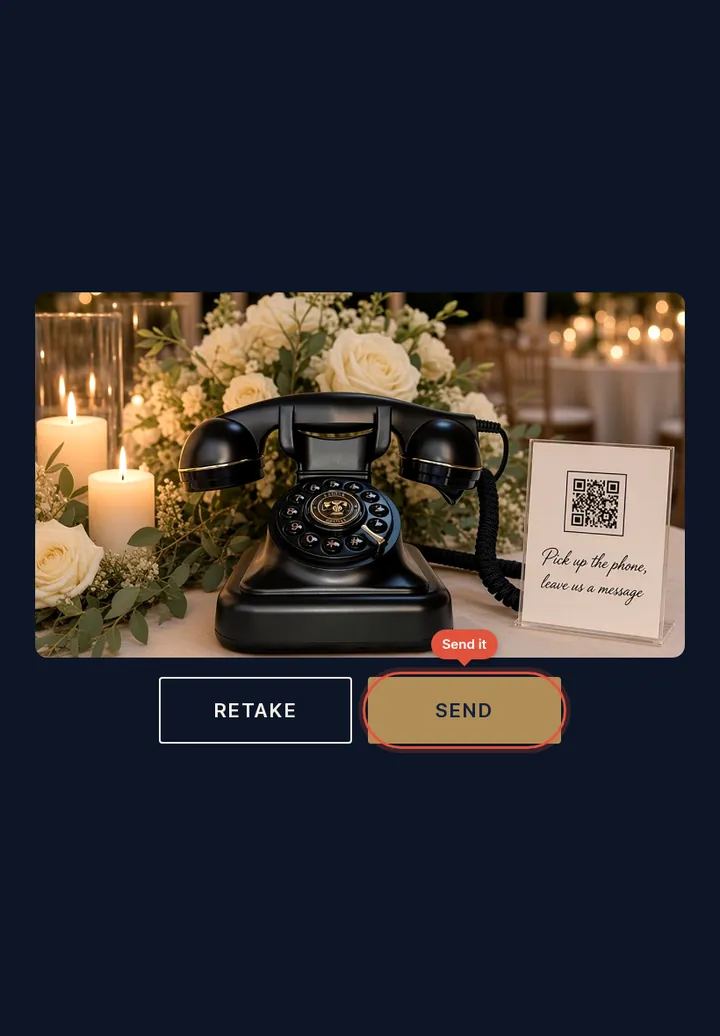
The kiosk preview: watch it back, then Retake or Send.
Retake or Send
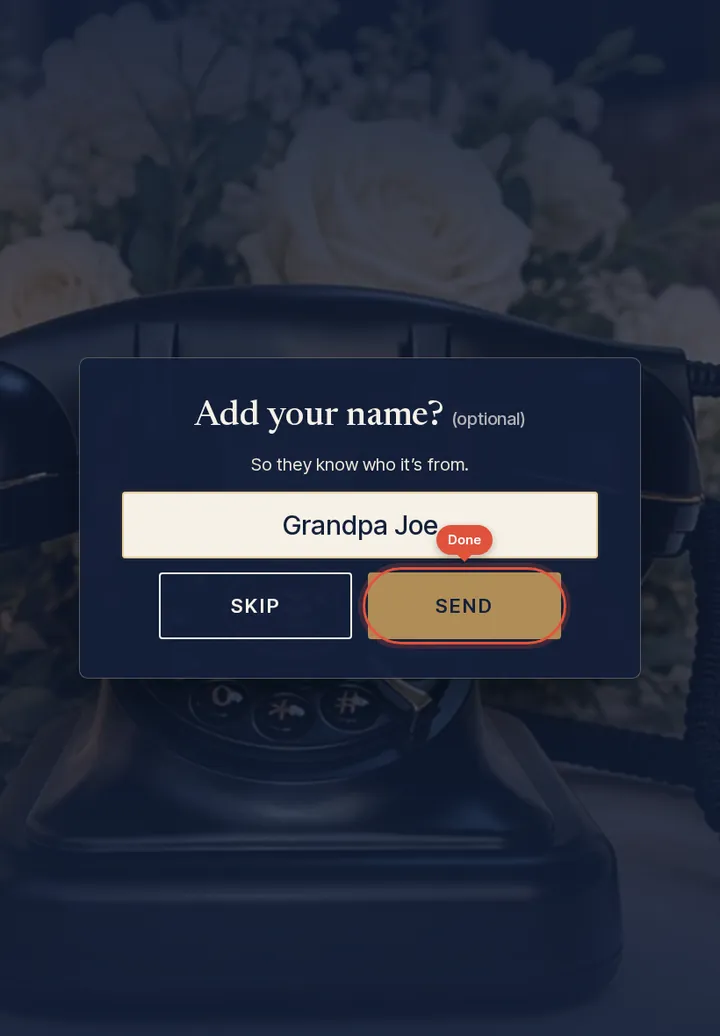
After sending, guests can add their name, or skip it.
Add your name
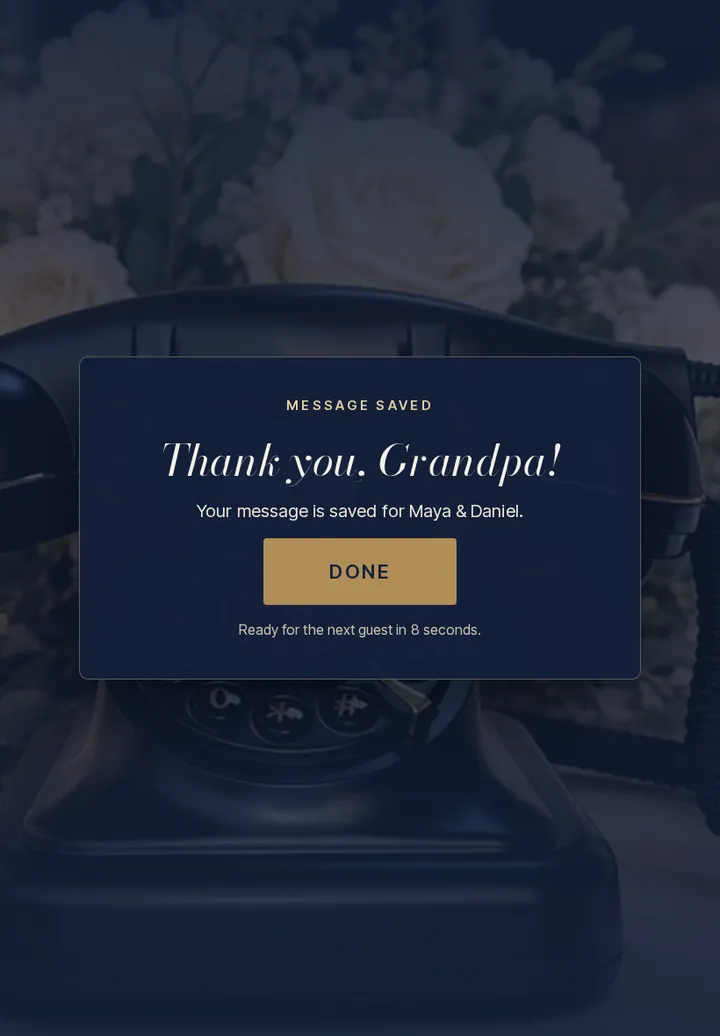
The kiosk thank-you screen. It resets to Start by itself for the next guest.
Done

Step FAbout a minute

Calling in instead

  1. Dial the phone number on the sign or the text from the host.
  2. If asked, enter the 6-digit event code from the sign. A friendly AI host picks up.
  3. Leave your message, then hang up.

You’re done when you hang up. It works on any phone, even without data. The message lands in the host’s dashboard like any other.

Pro tips

Look like you’ve done this a hundred times.

  • Put the QR sign where people wait.The entrance, the bar and every table. Eye level, in good light. A sign on a dark corner table gets missed.
  • Have the MC say it once, out loud.A quick mention reminds everyone it’s there. Hand them this:

    “Before you hit the dance floor: there’s a QR code on every table. Scan it and leave [names] a quick message. A story, some advice, or just hello. It takes a minute, and they’ll keep it forever.”

  • Remind them near the end of the night.One more mention before the last dance, then text the link to everyone the next morning. Your guestbook stays open until 14 days after the event.
  • Give the kiosk a quiet, well-lit corner.Light in front of faces, never a bright window behind them. Camera at about eye level, iPad on its charger, Do Not Disturb on, and a small “Step in and leave a message” sign.
  • Seed it with one message.Ask a close friend to go first. Guests relax when they see it’s easy.
  • Give guests a prompt.“Your best advice in one sentence” gets better messages than “say something.”

If something goes wrong

Quick fixes.

“It says the camera isn’t allowed.”
  • iPhone: open Settings › Apps › Safari › Camera and choose Allow, and the same for Microphone (on iOS 17 and earlier it’s Settings › Safari). Then reload the page.
  • Android (Chrome): tap the icon left of the web address › Permissions, and allow Camera and Microphone. Then reload.
  • Still stuck? Tap Or use your iPhone camera under the video button to record with the phone’s own camera, or tap the round button for a voice message.
“There’s no Wi-Fi here.”
  • Guests can use their phone’s mobile data.
  • The phone line works on any phone with a signal, no data needed.
  • Guests can record later from home. The link stays open until 14 days after your event.
  • The iPad kiosk keeps videos on the iPad and uploads them when the connection is back. A phone hotspot works too.
“A guest can’t find the link.”
  • Open your dashboard, tap Copy on “Share with guests” and text it to them.
  • Or point them to any QR sign.
  • Or give them the phone number and event code from the same card.

Ready when you are.

Set up in about three minutes. Remade or refunded if you don’t love it.

From $149 · remade or refundedStart now